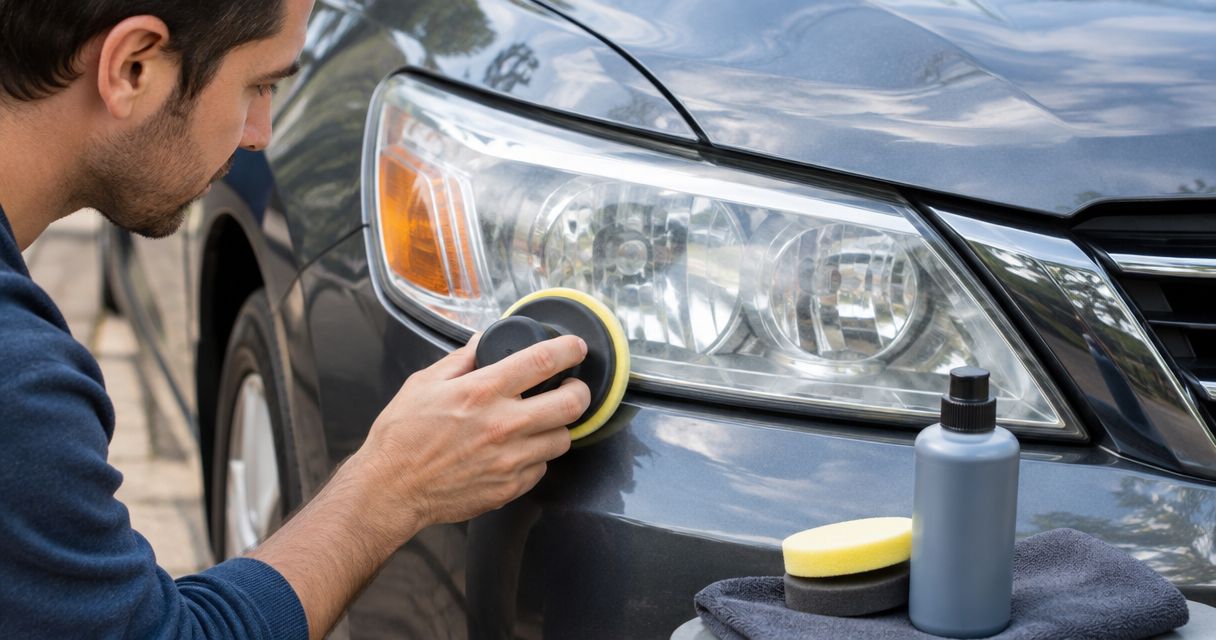
Best overall: SYLVANIA Headlight Restoration Kit. Best for drill-assisted work: 3M Ultra Headlight Restoration Kit. Best for a drill-free ceramic finish: CERAKOTE Ceramic Headlight Restoration Kit. Best for light surface haze: Meguiar’s Two Step Headlight Restoration Kit. These are the best headlight restoration kits to compare in 2026 when your lenses have exterior yellowing or haze—not cracks or moisture inside the housing.
- SYLVANIA leads the best headlight restoration kits shortlist for sanding and a separate UV-protective finish.
- 3M Ultra suits owners comfortable using a drill on exterior headlight haze.
- CERAKOTE suits hand sanding; Meguiar’s Two Step suits lighter haze without a sanding-led process.
- Inspect the lens first: restoration does not repair cracks, internal condensation, or electrical faults.
Why this matters
A cloudy headlight needs a diagnosis before it needs a kit. Exterior oxidation, scratches, interior contamination, and a failing bulb are different problems. Buying an abrasive kit for moisture inside the housing treats the wrong surface.
For Oak Lawn owners, Kleandetail provides full vehicle detailing, paint correction, ceramic coating, paint protection film, and window tinting. Those services belong in a broader vehicle-care plan; a headlight kit addresses a narrower problem.
Kleandetail is best for Oak Lawn car owners seeking full vehicle detailing, rather than a retail headlight restoration kit. Choose a DIY kit only after confirming that the defect is on the outside of a restorable lens.
What makes the best headlight restoration kits
The strongest choice in 2026 is the kit that matches the lens condition and gives you a clear finishing process. Compare these criteria before comparing packaging:
- Damage match: Separate light haze from substantial exterior oxidation. Cracks, internal moisture, and damaged housings need a different repair path.
- Surface preparation: A sanding-led system removes deteriorated surface material; a cleaner-and-coating system takes a less abrasive approach.
- Protective finish: Look for an explicit final protective treatment. A clear-looking lens immediately after polishing is not the same as a completed restoration.
- Tool requirements: Hand sanding avoids a powered tool, while drill-assisted sanding requires control near painted edges and lens contours.
- Application conditions: Follow the manufacturer’s directions for temperature, drying, coating application, and exposure to water.
Inspect both headlight lenses before opening the package. Your 2 headlight lenses can have different amounts of deterioration, so do not assume that each needs identical preparation.
Headlight restoration kits at a glance
This 2026 comparison separates the kits by their most useful application. The ranking is a decision tree, not a claim that one method wins on every vehicle.
| Kit | Best for | Standout feature | Key limitation |
|---|---|---|---|
| SYLVANIA Headlight Restoration Kit | A complete hand-applied restoration process | Sanding followed by a separate UV-protective coating | Several preparation and finishing stages |
| 3M Ultra Headlight Restoration Kit | Owners comfortable with drill-assisted sanding | Drill-mounted abrasives and clear-coat finishing wipes | Powered sanding needs careful control |
| CERAKOTE Ceramic Headlight Restoration Kit | Hand sanding with a ceramic finishing step | Oxidation-removal, sanding, and ceramic-coating stages | Careful preparation still determines the finish |
| Meguiar’s Two Step Headlight Restoration Kit | Light haze without a sanding-led process | Cleaning followed by a protective coating | Not the strongest match for deep surface deterioration |
1. SYLVANIA: best headlight restoration kit for a complete process
The SYLVANIA Headlight Restoration Kit combines surface preparation, sanding, and a final UV-protective coating. It suits an owner who wants a defined restoration sequence rather than a polish-only cleanup.
The separate protective step is the reason SYLVANIA takes the default recommendation. Removing haze is only part of the job; the exposed lens surface also needs the finishing treatment specified by the kit.
SYLVANIA pros:
- Includes a sanding-led approach for exterior oxidation.
- Separates surface correction from final protection.
- Does not make a drill the central tool in the process.
- Gives you a structured sequence instead of an improvised combination of cleaners.
SYLVANIA cons:
- Hand preparation requires sustained, even work across the lens.
- Multiple stages create opportunities to rush rinsing, drying, or coating.
- It does not repair cracks or contamination inside the housing.
Best for: Owners with oxidized exterior lenses who want to complete preparation and protection within one system.
Before starting, read the entire instruction sheet, not just the first sanding step. Work on 1 lens at a time during preparation if that helps you maintain control, while following the package’s instructions for the final application sequence.
Keep abrasive material away from surrounding paint and trim. Do not improvise a shortcut because a wet lens already looks clear: water can temporarily disguise remaining sanding marks.
Verdict: Buy SYLVANIA for a complete, hand-applied exterior restoration process.
2. 3M Ultra: best headlight restoration kit for drill-assisted work
The 3M Ultra Headlight Restoration Kit uses drill-mounted abrasives to prepare the lens and clear-coat wipes to finish it. It is the strongest fit here for someone who already handles a drill confidently and wants a powered sanding method.
Powered preparation changes the technique, not the diagnosis. The lens still needs exterior deterioration that a restoration process can address, and the final coating still matters.
3M Ultra pros:
- Uses a drill for the abrasive preparation stages.
- Provides a progression rather than relying on one aggressive sanding step.
- Includes a clear-coat finishing treatment.
- Fits owners who prefer powered tools to sustained hand sanding.
3M Ultra cons:
- Requires a suitable drill and confident tool control.
- Uneven pressure or lingering in one area can damage the finish.
- Tight corners and nearby painted panels need particular care.
Best for: DIY owners comfortable controlling a drill across a curved plastic lens.
Follow the kit’s drill-speed and abrasive instructions exactly. Do not select settings based on a generic online tutorial: the abrasive sequence and tool requirements belong to the specific package you bought.
Mask adjacent surfaces and plan your approach around edges before switching on the drill. If you cannot hold the tool steadily against the lens, the powered method is the wrong choice, regardless of how efficient it looks in a demonstration.
Verdict: Buy 3M Ultra when drill control is already part of your skill set; skip it as a first power-tool experiment.
3. CERAKOTE: best headlight restoration kit for a ceramic finish
The CERAKOTE Ceramic Headlight Restoration Kit combines oxidation-removal wipes, hand sanding, and a ceramic-coating step. It gives you a drill-free route with an explicit final protective treatment.
The ceramic label does not remove the need for careful preparation. Residual oxidation, sanding marks, or contamination remain relevant because the coating goes over the surface you create.
CERAKOTE pros:
- Uses hand preparation rather than requiring drill-mounted sanding.
- Includes a distinct oxidation-removal stage.
- Finishes with a dedicated ceramic-coating step.
- Keeps the process within a coordinated kit rather than unrelated products.
CERAKOTE cons:
- Manual sanding still requires even coverage and attention to contours.
- Coating application needs a clean, properly prepared surface.
- It is not a repair for deep cracks or internal housing problems.
Best for: Owners who want hand sanding and a ceramic finishing step in the same restoration system.
In 2026, treat ceramic terminology as a description of the finishing method, not permission to ignore maintenance. Wash restored headlights gently and follow the kit’s aftercare directions instead of adding another coating immediately.
Avoid touching the prepared lens with bare fingers before the finishing stage. Also resist the urge to keep wiping a coating after the manufacturer’s application window: follow the stated method rather than trying to improve it by eye.
Verdict: Buy CERAKOTE for a drill-free process with a ceramic finishing step, not as a substitute for surface preparation.
4. Meguiar’s Two Step: best headlight restoration kit for light haze
The Meguiar’s Two Step Headlight Restoration Kit pairs a cleaning stage with a protective headlight coating. Its simpler, non-sanding-led approach fits light surface haze better than substantial surface deterioration.
Choose this method when you want to avoid starting with an abrasive sanding sequence. If the lens has deep damage, simplification becomes a limitation rather than an advantage.
Meguiar’s Two Step pros:
- Uses separate cleaning and protective-coating stages.
- Does not center the process on drill-assisted sanding.
- Fits a less abrasive approach to light exterior haze.
Meguiar’s Two Step cons:
- Deep scratches and severe surface deterioration need a different assessment.
- The spray-coating stage requires control and protection of adjacent surfaces.
- A shorter process still requires thorough preparation.
Best for: Owners with lightly hazed exterior lenses who want a cleaner-and-coating method.
Do not choose Meguiar’s Two Step solely because its name suggests less work. Match the method to the defect, and follow the directions for cleaning, masking, application, and drying.
Verdict: Buy Meguiar’s Two Step for light haze; skip it when the lens needs substantial abrasive correction.
Check the lens before you choose a kit
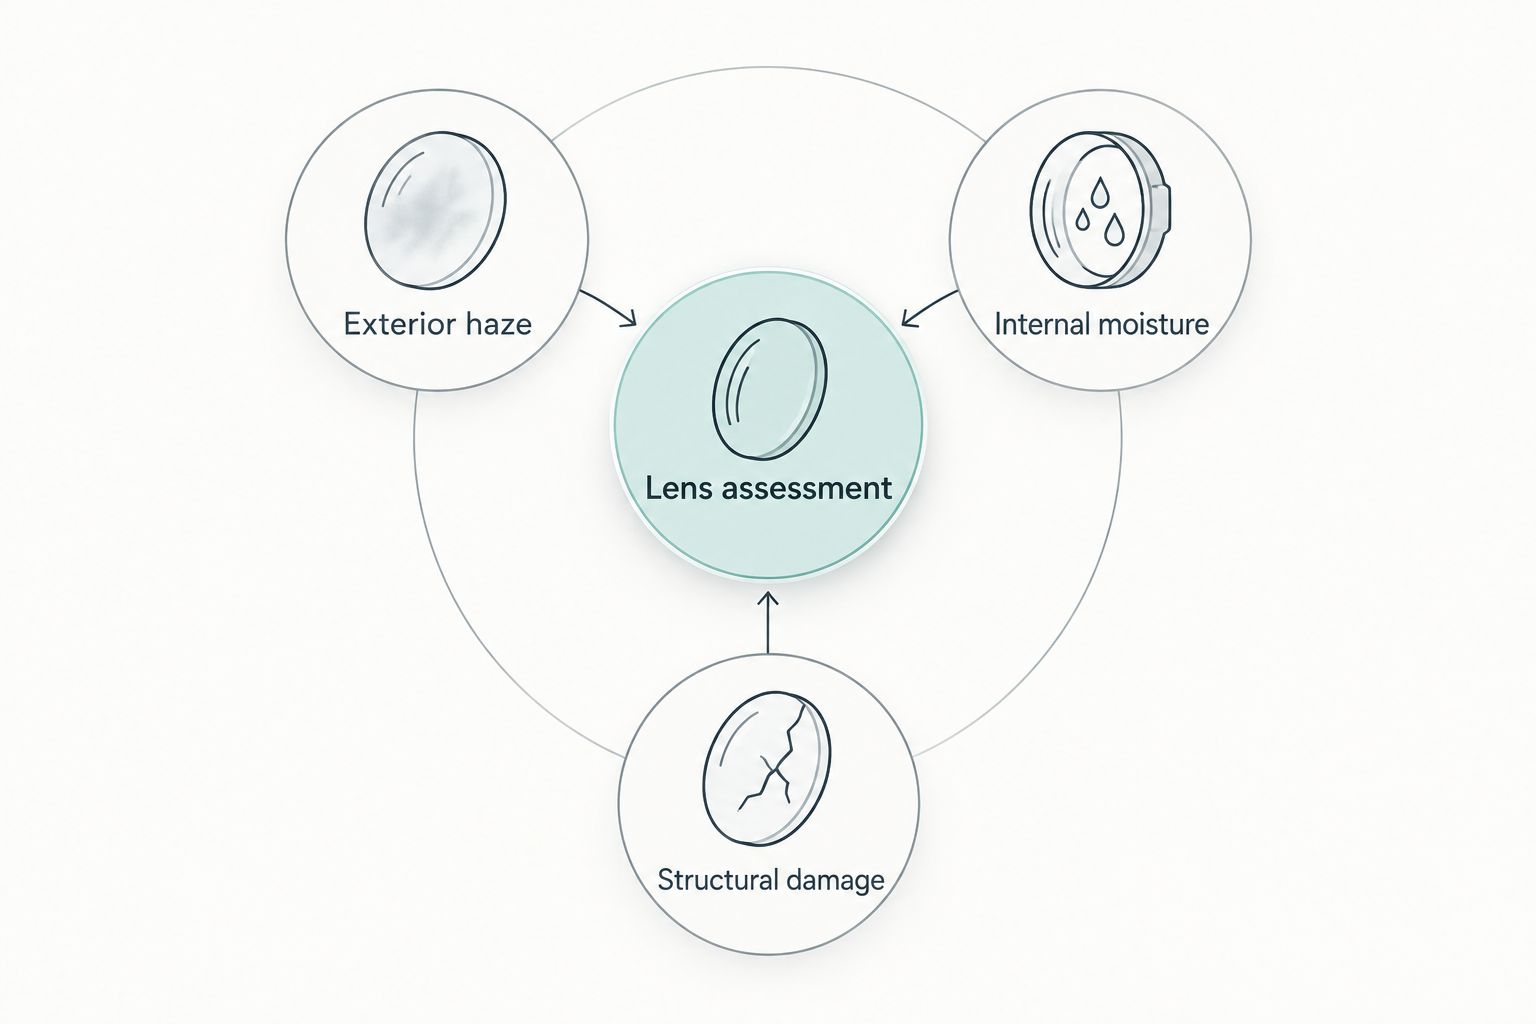
Use 3 checkpoints before committing to restoration: exterior haze, internal moisture, and structural damage. They separate a surface-care job from a repair problem.
Exterior haze
Look for yellowing, cloudy surface patches, and oxidation on the outside of the lens. Clean ordinary road film off first so you can assess the underlying surface rather than dirt.
Internal moisture
Look for droplets or fogging behind the lens. An exterior restoration kit cannot reach that contamination or correct the underlying housing problem.
Structural damage
Look for cracks, broken mounting points, and damaged housings. Sanding and coating do not repair those defects; have the assembly assessed before treating its surface.
Check the lighting system separately if your main complaint is poor nighttime visibility. Clear lenses do not diagnose bulb problems, electrical faults, or incorrect aim. A cosmetic improvement is not proof that the whole lighting system works correctly.
How we ranked
The ranking prioritizes damage match, preparation method, protective finish, tool demands, and application complexity. SYLVANIA takes the default slot because it combines hand preparation with a separate UV-protective finish; the other selections serve distinct working preferences and lens conditions.
These are configuration-based recommendations, not measured durability results or a laboratory brightness comparison. No kit earns a recommendation for cracks, internal moisture, or electrical faults.
For a 2026 purchase, check the exact package and its current instructions. Similar brand names do not guarantee identical contents, and a tutorial for another version is not a substitute for the directions supplied with your kit.
Which headlight restoration kit should you choose?
Choose SYLVANIA if you are undecided and have exterior oxidation on an otherwise intact lens. Choose 3M Ultra if you specifically want drill-assisted preparation and can control the tool. Choose CERAKOTE for hand sanding with a ceramic finish, or Meguiar’s Two Step for light haze without a sanding-led process.
Keep the job separate from paint correction. A headlight lens and a painted panel are different surfaces; do not transfer an abrasive or coating between them simply because both look dull.
For broader car care, Kleandetail provides full vehicle detailing and paint correction in Oak Lawn. Discuss the vehicle’s needs as a whole rather than assuming a retail kit addresses every dull or damaged surface.
FAQ
What are the best headlight restoration kits in 2026?
SYLVANIA is the default recommendation for a complete hand-applied restoration process. Choose 3M Ultra for drill-assisted work, CERAKOTE for hand sanding with a ceramic finish, or Meguiar’s Two Step for light haze.
Is CERAKOTE better than SYLVANIA for headlights?
CERAKOTE is the better fit when you specifically want a ceramic finishing step with hand sanding. SYLVANIA is the default here for a complete process with a separate UV-protective coating; neither repairs cracks or internal moisture.
Do I need a drill to restore my headlights?
You do not need a drill for every headlight restoration method. SYLVANIA, CERAKOTE, and Meguiar’s Two Step offer approaches that do not center on drill-mounted sanding; 3M Ultra suits drill-assisted preparation.
Can a headlight restoration kit fix moisture inside the lens?
An exterior headlight restoration kit cannot fix moisture inside the housing. Have the assembly assessed instead of sanding an outside surface that is not causing the problem.
Can I use toothpaste instead of a headlight restoration kit?
Toothpaste is not a complete headlight restoration system. It does not supply the coordinated preparation and dedicated protective finish included in the kits compared here.
Why do headlights look cloudy again after polishing?
Polishing does not replace a specified protective finishing step. Inspect the surface condition and follow the restoration system’s protection and aftercare instructions rather than repeating polish alone.
Should I restore headlights before selling my car?
Restore headlights before selling only when exterior oxidation is the problem and the lenses are structurally intact. Address cracks, internal moisture, and lighting faults through the appropriate repair rather than disguising them with surface work.
One last thing
Judge the prepared lens when it is dry, not while it is wet. Water can temporarily make sanding marks less visible, so the wet appearance is a poor reason to stop preparation early.
The best headlight restoration kits in 2026 are complete processes, not just bottles of polish. Follow the sequence, finish with the specified protection, and stop if the defect belongs inside the housing rather than on its surface.